You did it! You took the first leap by signing your child up for Adventure Treks 2025. What an AWESOME adventure we’re all going to have this summer.
As a first-time family, it can be a little nerve-wracking sending your teenager on a 13- to 30-day trip with a new group of peers and instructors. So we asked a few returning families for advice and tips for our new families to help ease any nerves and get everyone as excited and prepared as possible. Here’s what they said!

What advice do you have for parents or students who might be a little nervous about attending AT for the first time?
“Taking advantage of the opportunity to go outside of your comfort zone, to experience the thrill of the unknown, and to explore new parts of the continent is seldom afforded to today’s youth. Being a little nervous is perfectly OK and normal! Just know that AT prioritizes safety and has super-experienced staff. And they have always focused on matching up participants with lots of other first-timers so that every kid is similarly inclined to make new friendships.” – Jeff Berger from Cabin John, MD (10 trips between 3 daughters)
 “Try to relax. This trip is a dream! Call an AT family to help you relax.” – Brittany Schwartzwald from Atlanta, GA (3 trips between 2 kids)
“If you have a child who is nervous, I won’t say don’t worry (because we parents always do) but know that the instructors are AMAZING and will have your kid playing cards in the airport with other kids in five minutes. My son called to tell me he had arrived and was “under adult supervision” (as he put it jokingly) but had no time to talk to me because he already had new friends to hang out with. We are on our second trip with AT because they do such a great job. Trust their experience!” – Sarah Tueting from Naperville, IL (2 trips)
“I was so nervous about my two boys embarking on their first adventure with Adventure Treks last year. My husband had done the research, and I had talked with AT parents and the supportive directors Amanda and Dave, but still, at my core, I was just questioning if we were doing the right thing. 18 days with essentially no communication… what if they hated it, what if they were lonely, what if they didn’t get along with everyone… the worry and concern that I had didn’t stop. My husband was adamant that this would be a great adventure and would be a critical part of their adolescent development.
 WOW, was he correct! The boys (age 12 and 15) had an amazing trip. They had so much fun with the group and the instructors that they literally got off the plane and asked to go back!!! I honestly couldn’t believe how much they gained from the experience. They both got out of their comfort zone and did something that they hadn’t done before. I believe that this built some confidence and some resilience within them that they will lean upon in tough times. From beginning to end, the staff at AT has been great. They are so professional and supportive of the kids and the families. They truly believe in giving our kids real experiences, without electronics, without preconceived ideas, and without judgment. From all walks of life, the kids and instructors work together to create a truly magical and meaningful trip, and I am just so incredibly grateful that we found AT and that our boys are blessed to experience another trip with them this summer.” – Amy Morosoff from San Clemente, CA (2 trips between 2 boys)
“Adventure Treks goes above and beyond to create a supportive and welcoming environment for students of all backgrounds and experience levels. From our very first experience—two weeks in Rocky Mountain National Park three years ago—my son came home already counting down the days to his next trip. If your child enjoys being outdoors, is reasonably active, and is open to being part of a team, they’ll do great. The instructors are incredible at helping everyone feel comfortable, included, and challenged in the best ways.” – Jodi Eppler from Conifer, CO (4 trips)
What lessons have you learned about packing for AT?
“You’ll never have everything you want, but you’ll have everything you need. Bring flair for special occasions! Hiking poles can be helpful.” – Jeff
“Start early. And thrift / resale/ “buy nothing” groups are your friends. You absolutely want merino wool and good waterproof things. Break in your hiking boots.” – Brittany
 “Follow the packing list exactly!!!! It is perfect—my son was well prepared with what is on the list, and we followed it to the letter. We bought a lot of REI branded gear (it doesn’t have to be super pricey Patagonia), and it was great. He particularly loved the pants where the bottoms zip off into shorts. The only thing he said he would add is a camping pillow, which is a luxury, not a necessity. AT has this down to a science, and if you follow it, your child will be totally set!”
“We’ve followed the packing list each year and found it to be spot-on. With a teenage boy, I can confirm there are always a few things that come back untouched—usually extra socks and underwear! The most important things to get right are quality rain gear and solid mosquito protection. Also, duffel bags are definitely the way to go—no need for suitcases. And prepare yourself emotionally for a few lost items along the way… we’re currently down two cameras over three summers and countless pants with new holes in the knees, etc.” – Jodi
Any advice for opening day and flying to AT?
“Your AT adventure actually begins when your parents drop you off at the airport to navigate layovers and terminals. Practice leading your family through the airport, if possible, on a family vacation. Don’t be afraid to ask for help from a member of the airline staff and give yourself plenty of time. Pro tip: ask AT administrators to see if anyone from your area is on your trip and try to coordinate flights with a future friend.” – Jeff
“It’s a little stressful because everyone is feeling all their feelings. I recommend sending your most stoic adult for drop-off (not me). The most feeling parent (me) went and picked my kid up, and I loved that because I got the full download on the plane.” – Brittany
“My son prefers to arrive on the early side of the arrival window and depart in the middle of the departure window—he likes settling in early and having a little breathing room on the way home. If your child is flying, you can rest easy knowing AT staff are true pros at making travel days smooth and stress-free. On opening day, goodbyes tend to be quick by design, which actually helps the kids shift into ‘adventure mode’ and start bonding right away.” – Jodi
 Any tips for how parents should spend their time while kids are away at AT?
 Any tips for how parents should spend their time while kids are away at AT?
“My wife spends her time looking at pictures from AT on the website, but I don’t recommend [only doing] that…” – Jeff
“Go take your own adventure!” – Brittany
“Know that no news is good news while they are away… it means your child is having a blast and doing awesome.” – Sarah
“Our son has been going to sleepaway camp since he was in first grade. So sending him off to try a new adventure with new people is secondhand for us. And we find ourselves enjoying camp prep. He looks forward to the break to travel and try new things with new people… to escape the stress and anxiety of middle school. We spend the time recharging as parents and giving our other son some undivided attention.” – Katie Porwick from Normal, IL (2 trips)
“This is probably the hardest part—for us, anyway! Even after three trips, we still anxiously wait for photo and blog updates just to catch a glimpse of our son. It’s totally normal if your child’s group doesn’t post as many pictures as others; every group is different. And try not to read too much into the photos—if your kid is standing alone or not smiling in one shot, it doesn’t mean they’re having a tough time (though I know that’s easier said than done!).” – Jodi
Any other words of wisdom?
“Make sure your kid is fit! Prep and do some practice hikes with your kid.” – Brittany
 “Our son made some great friends—he is going to visit one of them in a few weeks! And a group of them decided to take this summer’s trip together. I totally underestimated the power of no names or contact before the trip so that the kids can just meet each other and get to know each other at face value, without the social media definitions that seem to follow us everywhere. It’s fantastic because they can just be who they are and make friends ‘old school’—just by hanging out and talking.” – Sarah
“One thing I would strongly encourage: Help your child be physically prepared before the trip. These adventures are physically demanding, and we’ve heard of trips being cut short or adjusted because a few students weren’t quite ready for the physical challenge. Being in shape makes the experience more enjoyable—not just for your child, but for the whole group.” – Jodi
You are all signed up for Adventure Treks this summer—WOOHOO!!!
You picked your destination, you’ve started packing, you’ve booked flights, and you can’t wait for the adventure to begin! Even so, you may be feeling some butterflies in your stomach about arriving to Adventure Treks, especially if this is your first trip. Perhaps you’ve never traveled alone, or maybe this is your first time in the outdoors. Nervousness from not knowing what to expect is completely normal—even our returning students and instructors get a little nervous on opening day. To help make your first day at Adventure Treks more exciting (and less nerve-wracking), we’d like to share what you can expect upon arrival to your big outdoor adventure this summer!
Landing at the airport
We know this is many of our students’ first time flying solo—and that in itself is something to be proud of. Upon landing, an AT instructor will likely be waiting at the gate to say hello and walk you to the group. We have every student’s phone number, so we also call and/or text students when they land so they know how to identify and find us. From there, we’ll help you find your luggage in baggage claim, and then you’ll meet the other students who have already arrived. There will be plenty of snacks waiting for you, and we’ll play games as we wait for everyone.
And remember—this is everyone’s first time in this specific group, so everyone is in the same boat in terms of not knowing everyone else.
Pizza lunch and games
Once everyone has arrived, your group will depart the airport for a nearby park for a pizza lunch! We’ll play some games to learn everyone’s names and get to know each other a little better. While eating together in a circle, a director will give a quick orientation, including introducing everyone and what to expect in the next few days. We want everyone to feel comfortable in the group and excited for our jam-packed itinerary. After lunch, we’ll pack up and head toward our first campsite, where dinner will be waiting. Some students will have been up since 2 or 3 a.m., so a quick nap on the ride is not out of the question; however, you also might find yourself in the middle of a singalong, as your instructors will have made fantastic playlists for the drive.
Arrive at camp
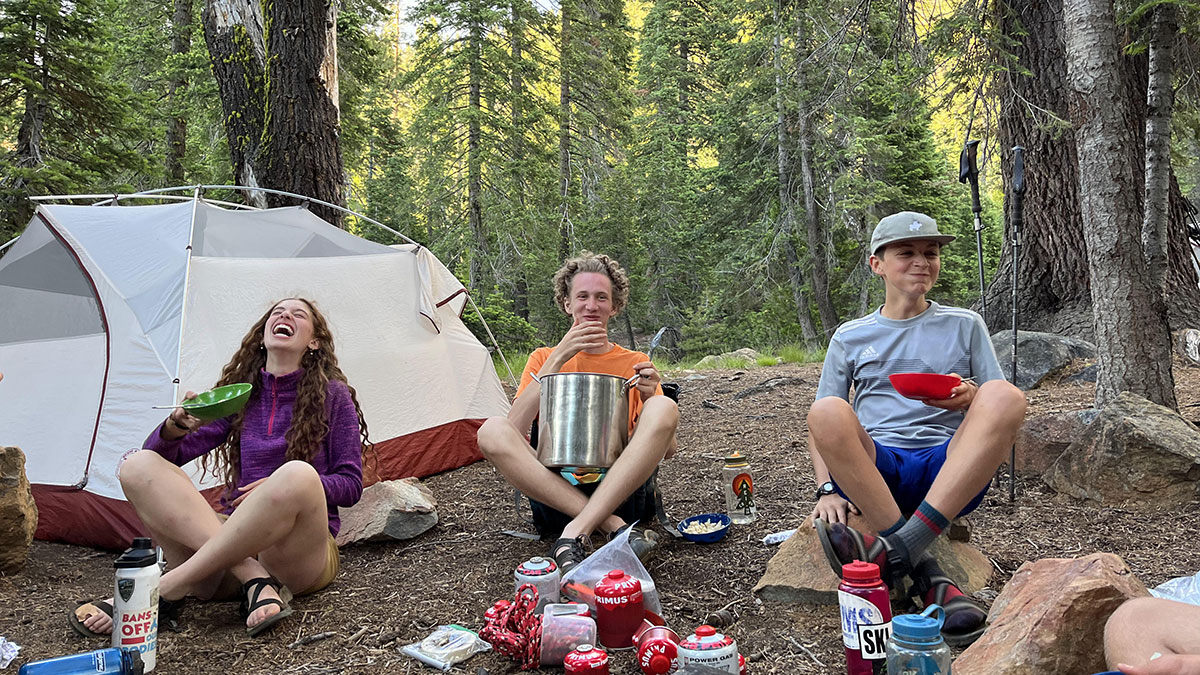
Before you know it, you’ll be pulling in to our first campsite for the night. One of your instructors will have stayed back from the airport to get everything set up: tents, sleeping bags, backpacks, even dinner! We’ll do our first “duffel shuffle” (an “assembly line” of transporting duffels from the U-Haul to a covered tarp area—we’ll do this a lot), and you’ll be shown to your tent with your tentmates for that evening. When everyone gets settled in, we’ll sit down for our traditional Yahoo! feast (named so because we are that excited that everyone has finally arrived). We like to welcome students with Yahoo dinner, as it’s a fantastic way to show everyone that not only will we eat real, high-quality food (not just granola bars or freeze-dried packaged meals), but we will always have enough food to keep everyone well-fed.
Tonight, we’ll make sure everyone knows where the bathrooms and hand-washing stations are, and we’ll talk through how to stay hygienic while in the outdoors.
First evening meeting
Evening meeting is one of the most fun, meaningful, and special traditions at Adventure Treks. It’s a fundamental component of an AT trip—something we do every night as a group that brings us closer together as a community. We sit in a circle and share the highlights of our day, give shout-outs to people for the kind and helpful things they did that day, and offer suggestions for ways the community can become even better. There are a ton of laughs as well. By the end of the first week, students have often begun taking over leading evening meeting. We won’t give everything away here, but during evening meeting, we’ll also go over the plan for the rest of the night and the plan for tomorrow so everyone knows what’s on the schedule and what to expect. For most trips, we go for a fun hike on the second day to continue getting to know each other and to jump right into the beautiful outdoors.
Bed time
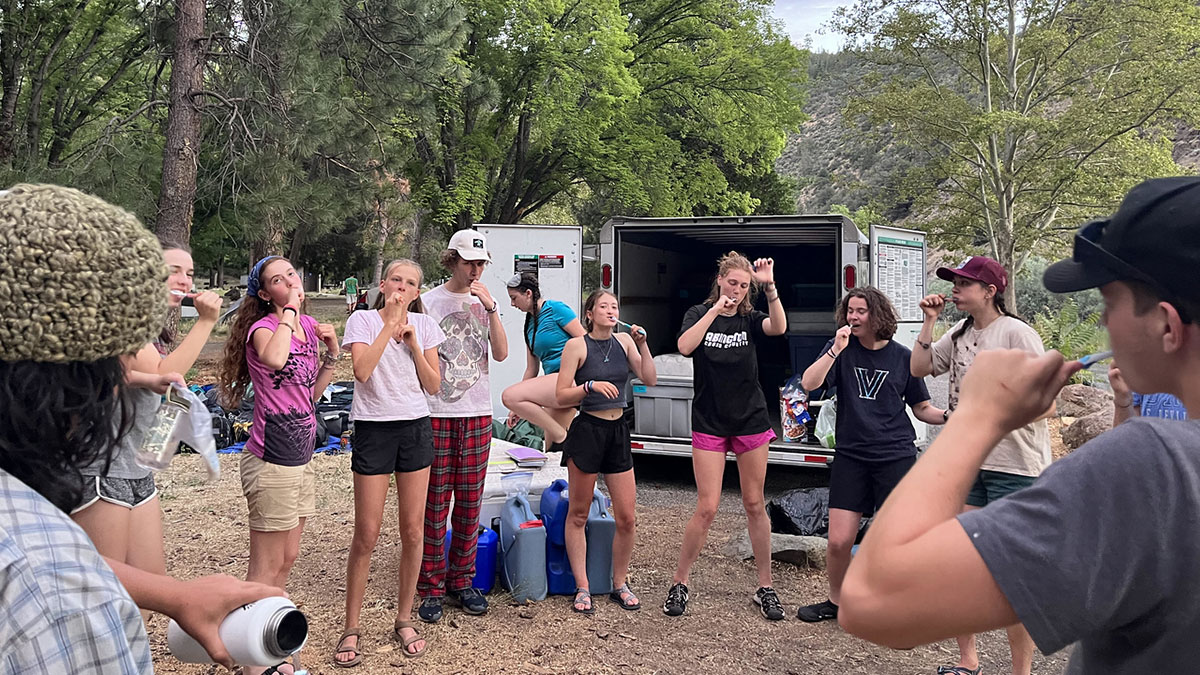
Because most students woke up early to travel (many cross-country) and many are adjusting to a new time zone, we’ll head to bed a little early tonight. After evening meeting, we’ll usually “wind down” with a toothbrush dance party and contact lens clinic. Then it’s off to our cozy sleeping bags for a restful night!
We know the first day can be a little overwhelming with meeting so many people and taking in so much new information, but it’s also a ton of fun as we embark on this great new adventure together. After the first few days, you’ll begin to form strong bonds with your peers, which often leads to lifelong friendships. And after the first week, everyone will be grooving in the same new routine.
We hope you’re as excited for this summer as we are!
Flowers are blooming and temperatures are rising—spring is here, and that means summer is soon to follow! Unbelievably, the first Adventure Treks trips of 2023 begin in less than two months. As you check items off of the packing list and get in touch with friends from previous summers, make sure you also take time to prepare your body for your trip.
Remember, you do not have to be the “star athlete” at school to have fun and be successful at AT! Everyone will be challenged by some part of the trip, no matter how many sports they play. Preparing your body for an AT trip is not about “getting in shape,” readying your “summer body,” or restricting yourself in order to look or feel a certain way. It is about being active in whatever ways feel good to you so that you arrive on your trip feeling strong and full of energy and confidence!
Here are some options for adding activity to your spring:
Walk!
Students sometimes worry that backpacking may be too strenuous for them. The easiest way to prepare your body for backpacking is to walk! Take a walk around your neighborhood before or after school, invite your friends and family for a hike at a local park or forest on the weekend, or even go to the gym and spend time walking on a treadmill or track. This is also the best way to break in your hiking boots if they are new, or to re-mold them to fit your feet best if you haven’t worn them since last summer.
If you’re looking for a more strenuous option, walk on hilly terrain, find stairs to climb, wear a backpack full of supplies while hiking/walking, or jog a few times a week instead!
Play sports—competitively or just for fun
Whether you compete for a school team or prefer a pickup game with friends, playing sports is one of the easiest and most fun ways to feel fit and strong. Soccer, tennis, lacrosse, swimming, basketball, and more are all great options. If you come from a yard game family, turn your spike ball, cornhole, or frisbee into a tournament and play all day! Roller skating or skateboarding, dancing, volleyball, jump rope, baseball, karate–whatever is fun for you, do it often, especially leading up to your AT trip.
Yoga, stretching, and weight training
Make sure to stretch your muscles before and after any activity in order to feel your best! Yoga is also a fantastic strengthening activity of its own. There are many free videos online to try out different types and levels of yoga, so it is easy to add a stretching session into your day. Many places have local yoga studios where you can learn even more from a teacher.
Many of our students also enjoy hitting the gym and lifting weights. Resistance training plus cardio activity will definitely help you feel strong!
Explore outdoor activities
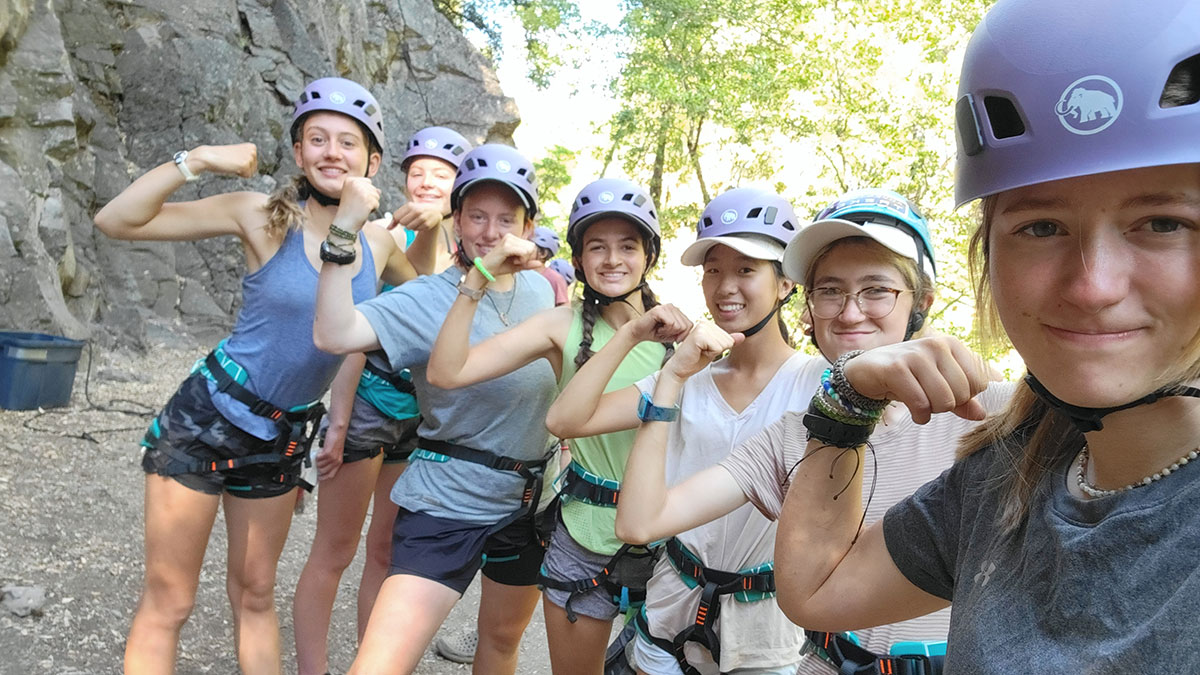
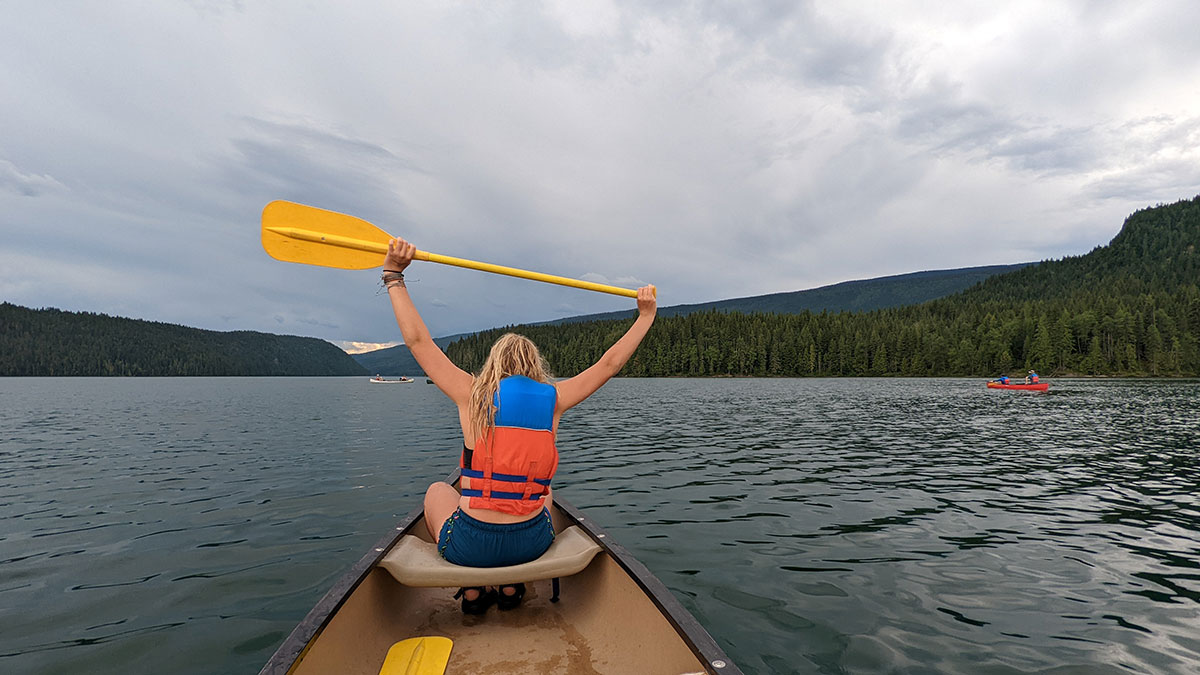
Depending on where you live, you may have a variety of outdoor activities available to try. If you have a bike, take a ride around your neighborhood or take a trip to a local bike park or mountain bike trail to try riding up and down hills. (Remember your helmet!) If you live near water, try kayaking, canoeing, or stand up paddleboarding (it’s harder than it looks!) to put your upper body muscles to use. Rock climbing is a fun and challenging way to explore the outdoors, and can also be a great way to spend a rainy day if there is a climbing gym near you.
Preparing your body for your trip isn’t just about being active. Drinking enough water, getting enough sleep, and fueling yourself adequately for the activities you’re doing are critically important to making sure you have the best summer possible. As the weather warms up, your body will be working harder to stay cool, so the amount of food and water you need to feel good might change. Eating a balanced diet will help give you the energy you need to have fun being active, and getting the recommended 8–10 hours of sleep per night will keep you from feeling worn out at the end of the school year. Remember to protect yourself from the sun when you’re outside, and treat any injuries carefully so that they heal as quickly as possible, just like you would on an AT trip!
Most important, preparing your body for your AT trip should be FUN! Try a new activity or challenge yourself to learn a new skill. Invite friends or siblings to participate. Offer your services as a lawn mower or dog walker to make a little money while doing something active. Have a dance party! Find a playground and do laps on the monkey bars. Whatever you choose, have a good time and remember to break in your hiking boots!
Encountering wild animals is one awesome part of exploring natural spaces. All of the beautiful parks, forests, and coastal habitats you’ll adventure in with AT are home to animals first—we are just visitors! Crossing paths with wildlife is usually exciting and a great opportunity to learn something new, but it might also be one reason you or your friends are nervous about your trip. Let’s talk about it!
What kind of wildlife might we encounter on an AT trip?
You might see a new type of animal every few days on your trip! Every region we visit has a variety of birds, squirrels, deer and other mammals, fish, and reptiles that you’re likely to spot. In Yellowstone National Park, bison roam everywhere, and you might see a bighorn sheep or moose. In California, you’ll likely see elephant seals on the Lost Coast, black bears in the Trinity Alps Wilderness, and perhaps a river otter while rafting. Moose and caribou are common in Alaska, and the Pacific Northwest is full of bald eagles and banana slugs.
Sometimes, animals are more comfortable roaming around at night, and you’ll see them during evening meeting or if you stay up late to stargaze. Rabbits, deer, owls, opossums, bats, racoons, and many types of frogs are more likely to be out and about around the edges of the day; they are nocturnal or crepuscular, which means most active at dawn and dusk. There are also many animals you are very unlikely to see because of low population density or avoidance of humans. Skunks, foxes, whales (and most large sea life), mountain goats, bears, snakes, and pika are some of the animals that share the spaces we travel in but which are very rarely seen!

I’m afraid of bears! I’m afraid of snakes!
That’s OK! A lot of people are afraid of animals that are potentially dangerous to humans. It is important to remember that the animal attacks in movies and books are extra dramatic to keep you entertained, but are actually extremely rare.
While snakes are scary to many, they have fascinating characteristics that keep them safe from humans—and us safe from them. For example, they don’t have ears, but instead “hear” vibrations through the ground and the air. When a group of 10 people comes hiking up a trail, snakes feel us coming and move out of the way quickly. Most snakes also don’t want to bite you. Whether they have venom, they need to save their energy and tools to capture animals they can actually eat, like mice and small birds.
Black bears are normally very wary of people and steer clear of us. They might exhibit defensive behavior if they feel threatened, which may happen if they are surprised, separated from their cubs, or protecting a food source. While it is possible to startle a bear, that is unlikely to happen when you are traveling in a group, playing games with each other, and singing songs (sounds like an AT backpack to me!). This is why we intentionally make a lot of noise while hiking—it’s one of the best tools we have to prevent an animal encounter.
Additionally, we never keep food sources in our around our tents; we safely store anything that a bear (or any other animal) might perceive as food (this includes any “smelly” item like toothpaste or deodorant) in bear-proof canisters and away from where we sleep.
How does practicing Leave No Trace principles apply to wildlife encounters?
You’ll hear a lot about the seven principles of Leave No Trace ethics with Adventure Treks, one of which is “respect wildlife.” In addition to making noise to try to prevent encounters, we’ll also plan ahead in other ways, like the aforementioned food storage containers, bear fences, traveling in groups when in the backcountry, and educating our students and instructors on animal safety and what to do in the event of an encounter.
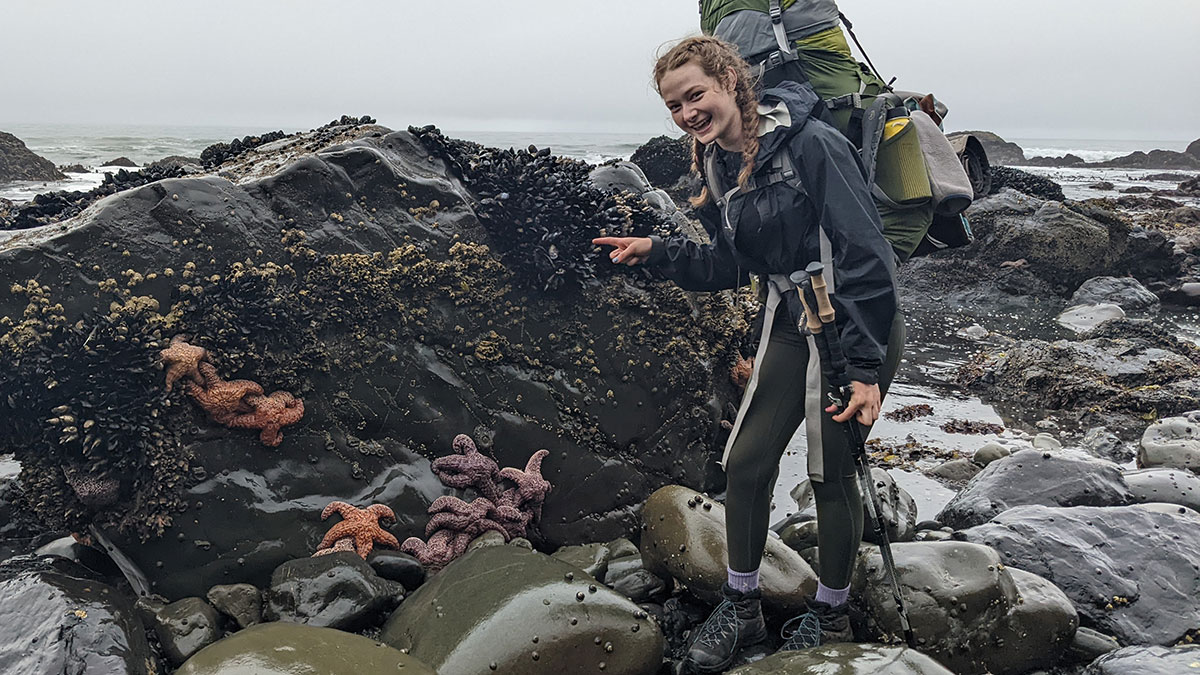
Respecting wildlife also includes being kind to animals. While offering food to wild animals is an easy way to get closer to them, it teaches the animals that humans are a source of food and increases negative interactions between people and wildlife over time. People are also much more likely to provoke an animal’s defense mechanisms by getting too close—which is why we never feed wildlife. While hiking on the Lost Coast, for example, there are signs that ask you to stay at least 200 feet away from the elephant seals. By respecting their space, you are much less likely to have a scary close encounter.

As a parent, do I need to worry about my child in a place where there are grizzly bears and other potentially dangerous wildlife?
Rest assured that regardless of the area, Adventure Treks instructors will go into great detail about the variety of wildlife that are present in our surroundings and all of the plans in place to prevent any interaction with them. Students will learn what to do in case of an encounter, and the group will practice safety protocols at all times so that everyone feels confident. Encountering wildlife from a safe and respectful distance should be an exciting part of an AT trip, not a nerve-wracking one!

Patagonia Retro Pile Fleece (heavyweight full-zip)
Interpreting the language of outdoor retail
When it comes to buying outdoor gear for Adventure Treks (or even for a personal trip), there’s nothing more daunting than trying to decipher every obscure label, material, fabric, and technology that comes with buying even the simplest outdoor item these days.
But Adventure Treks is here to help! This spring, we’re launching our Gear Series: Tips for Buying Outdoor Gear. We’ll discuss some of the materials, technologies, labels, and other features commonly found on outdoor equipment, and attempt to clarify their meaning, use, and how they’re helpful on an AT trip.
Fleece jackets and pullovers
What is fleece? Especially if you live in a warm climate, that’s a great question. Despite being a staple of any outdoor packing list, this product is often poorly defined. The title “fleece” is applied to such a wide-ranging variety of products that it can be difficult to know what to actually purchase.
What is fleece?
Fleece is simply a fabric: a soft, fuzzy material made from processed or recycled plastic or polyester or other synthetic fibers. These fibers are processed until they are soft enough to weave into fabric, which is then “brushed” to create the fluffy texture that we would recognize as fleece. The finished product resembles sheep’s wool, from which it gets its name.
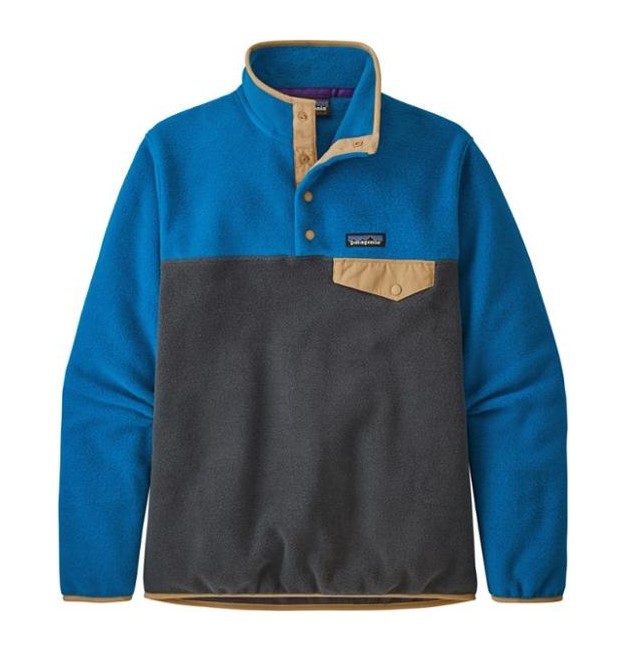
Patagonia Synchilla Snap-T Fleece Pullover (midweight)
Why wear fleece?
A fleece layer is a must-have for many different outdoor settings, including all Adventure Treks trips. Until synthetic fabrics (and merino wool, the soft, fine weave that most of today’s products use) hit the market, the staple outdoor non-cotton material was wool because of the warmth it provided and its natural oils that would help retain its warmth when wet. The downside to the wool of old (and the reason for the emergence of merino fabrics): They were bulky, heavy, and sometimes retained a lot of odors.
Nowadays, fleece is a staple in most households. Because it’s a synthetic or made-from-recycled-plastic fabric, its thick network of fine fibers provide insulation while remaining lightweight. And because plastic doesn’t absorb moisture, it retains its insulative properties when wet. Plus, fleece tends to be less expensive than wool. Jackpot!
Fleece weight and warmth
In the fleece world, “warmth” and “weight” are fairly intertwined: To talk about one is to talk about the other. Fleece descriptions often include terms like heavyweight, midweight, or lightweight. This refers to the fabric’s thickness, its actual weight, and how warm it’ll keep a person. (You may also see the term “pile”; this refers to fabric with loops, strands, or tufts of yarn standing up, resembling the fluffy bath mat material.)
- Heavyweight: About as thick as a fluffy, terry cloth towel. The warmest designation. Not a requirement for Adventure Treks but would be fine.
- Example: Patagonia Pile Jacket
- Midweight: About as thick as a sweatshirt or sweatpants. This designation is predictably the middle of the pack in terms of warmth. A great option for Adventure Treks.
- Lightweight: About the thickness of a cotton dish towel. The least warm, but great to wear over a long-sleeve shirt and under a jacket.
If your Adventure Treks packing list says to bring two fleeces, one of them can be lightweight. If it just lists one fleece, you’ll want to pack a midweight.
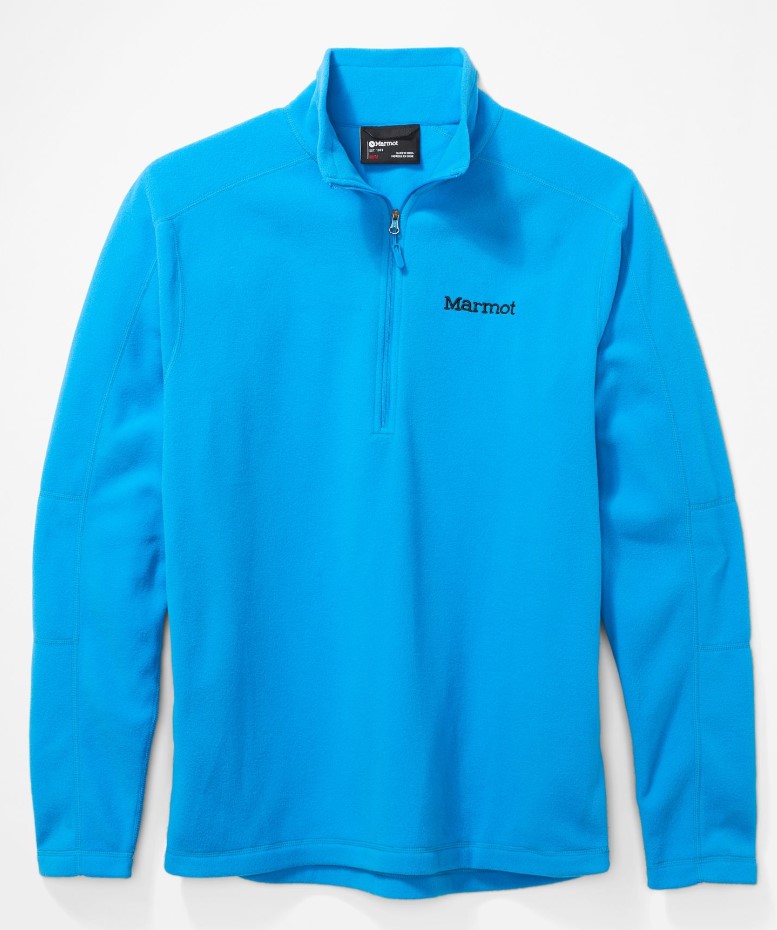
Marmot Rocklin Half-Zip Jacket (lightweight)
Fleece styles
- Hoodie: A fleece hoodie is a great option when you won’t be wearing other layers over it (a hood can get in the way of a rain jacket). If you’re only bringing one fleece, don’t bring a hooded one.
- Pull-over: Think of a crew-neck, V-neck, or quarter-zip fleece. It’s a versatile style and should be one of the fleeces you pack for Adventure Treks.
- Jacket: This refers to a full-zip top. It adds a little extra bulk (and thus weight) and will often be a mid- or heavyweight option. Another great fleece to bring to Adventure Treks.
Fleece takeaways
- A fleece is an essential and versatile piece of gear that we will use again and again at Adventure Treks.
- You’ll never go wrong with a midweight fleece, and when in doubt, go with a pullover.
- In the end, don’t worry too much about weight and warmth; as long as you have something that says fleece in the description and in the quantity shown in your packing list, you’ll be OK!
Interpreting the language of outdoor retail
When it comes to buying outdoor gear for Adventure Treks (or even for a personal trip), there’s nothing more daunting than trying to decipher every obscure label, material, fabric, and technology that comes with buying even the simplest outdoor item these days.
But Adventure Treks is here to help! This spring, we’re launching our Gear Series: Tips for Buying Outdoor Gear. We’ll discuss some of the materials, technologies, labels, and other features commonly found on outdoor equipment, and attempt to clarify their meaning, use, and how they’re helpful on an AT trip.
Insulated (aka “puffy”) clothing
Warm clothes don’t create heat to keep you warm when it’s cold and/or wet outside. (OK, there are some garments with built-in batteries and heating elements, but let’s not talk about those for now.) Products that are designed to keep you warm in the elements do so with the help of insulation: layers of material that trap warm air from your body and keep it close to your skin, while stopping cold air from the outside getting in.
While insulated bottoms exist, they’re not applicable for Adventure Treks, so we’ll stick to upper body layers like coats and jackets. Some Adventure Treks trips (like Alaska Expedition, Ultimate Northwest, and California Challenge) include insulated jackets on the packing list due to mountaineering activities or colder weather. However, if your child gets cold easily, you can pack an insulated jacket for their trip just in case—just please pack synthetic (see below).
Insulation glossary
 Synthetic: Synthetic insulation comprises long, very fine strands of plastic, piled together to form a fluffy, gauzy-like material, typically formed into sheets and sewn in place between the outer fabric and lining of the product. Because the insulation is plastic, it’s naturally water-resistant and will not collapse and “mat” together when wet. Synthetic items allow the warm air to continue to be trapped against the skin and maintain an insulative property even while wet. Synthetic insulation is almost always less expensive than down insulation, but it will be slightly heavier and bulkier than its down counterpart.
*We ask that students bring synthetic insulated jackets to Adventure Treks so that even if the material gets wet, it will keep your child warm.
Down: Down insulation uses the fluffy and soft down feathers, generally from ducks or geese, that help keep birds warm. These are very light and can trap a lot of air, so down insulation provides a fantastic warmth-to-weight ratio (essentially, it doesn’t need to be heavy to be warm). Because of its light weight and compressibility, down is a great choice when space and weight are an issue. The main drawback to down is that it doesn’t keep you warm when wet: In rainy conditions, these feathers will collapse, clump up, and mat, leaving no space for warm air to be trapped and rendering the jacket ineffective.
Fill power: This term describes the quality of down feathers used in a product, essentially measuring how the “loft” (how fluffy the feathers are, and how much air they can trap). Super fluffy feathers will trap a lot of air, so they will have a higher fill power. Feathers with more of the vein (that hard quill part of the feather) won’t trap as much air and will have a lower fill power. High loft = traps a lot of air. Low loft = not so much air. You’ll see this measurement listed as a number value, most commonly 650, 700, 800, and 900.
- 650–700 fill: Good loft, slightly more quill so feathers sometimes poke through the face fabric of these products. Good warmth-to-weight ratio. Less expensive options
- 800–900 fill: Very high loft and fewer quills on these feathers, so much less likely that feathers will poke through. Excellent warmth-to-weight ratio. Most expensive options
Insulation takeaways
- If purchasing a new insulated jacket, go with down if you’ll be spending a lot of time in dry climates like California.
- If you face the potential for lots of rain and snow (like in Alaska or the Pacific Northwest in winter), go with a synthetic jacket; these are typically a little more durable as well.
- For an AT trip, go with a synthetic jacket or coat; parkas are not necessary for our trips.
Interpreting the language of outdoor retail
When it comes to buying outdoor gear for Adventure Treks (or even for a personal trip), there’s nothing more daunting than trying to decipher every obscure label, material, fabric, and technology that comes with buying even the simplest outdoor item these days.
But Adventure Treks is here to help! This spring, we’re launching our Gear Series: Tips for Buying Outdoor Gear. We’ll discuss some of the materials, technologies, labels, and other features commonly found on outdoor equipment, and attempt to clarify their meaning, use, and how they’re helpful on an AT trip.
Waterproof rain gear
Waterproof rain gear is an essential item on any outdoors packing list; no matter the weather, it’s an indispensable piece of your personal gear kit. With that said, it can be confusing to know if you’re purchasing the right item. “The list says rain coat; this one looks good, but it says it’s a hard shell, not a rain jacket. Will that work? Oh, it’s GoreTex; do I need GoreTex? Wait, what is GoreTex?”
To make your shopping easier, we’ve included some helpful terminology below with advice on choosing the right rain jacket and rain pants.
(Note that while we mostly talk about rain jackets, the following applies almost identically to rain pants.)
Rain gear glossary
Waterproof: An item that’s truly waterproof means it’s made from PVC vinyl or fabric that’s treated with a rubberized coating, creating an impermeable layer that water can’t get through. While these products are indeed waterproof, they’re heavy, bulky, and don’t” breathe” for hiking or other activities (the classic yellow fisherman’s coat comes to mind).
Because we’re so active in the outdoors at Adventure Treks, we need something that’s both waterproof and breathable (backpacking in a rubber coat would cause a swampy, sweaty mess).
Bottom line: Don’t buy this kind of jacket or pants for an AT trip.

Waterproof-breathable: The magic phrase! This describes technology built into a garment that prevents water from seeping through the fabric on the outside, while allowing water vapor from your body (i.e., sweat) to escape. Essentially, the “pores” in waterproof-breathable materials are small enough to keep water out, while still allowing vapor to escape. This means you can hike in this kind of jacket and not worry about sweating or getting that clammy feeling—while being protected from the elements.
Many companies have proprietary waterproof-breathable technologies such as Polartec’s Power Shield, Marmot’s PreCip, Patagonia’s H2No, or The North Face’s DryVent— but they’re all just different names for the same thing.
Bottom line: A waterproof-breathable jacket and pants are a MUST for any Adventure Treks trip—or if you live in a humid, rainy climate where you’ll spend a lot of time moving around outside.
Hard shell vs. soft shell: Hard shell simply refers to a waterproof-breathable fabric that has no insulation (like a heavier ski jacket). It doesn’t keep you warm and dry, just dry. We like to layer fleece jackets or comfortable baselayers under a rain jacket to keep warm.
A soft shell is a pliable fabric made from woven synthetic fibers that is, well, soft and feels more like a sweatshirt than a rain jacket. While not waterproof, these fabrics are often treated with DWR (see below) to provide some protection. While they provide some insulation and protection from the wind, they’re not acceptable substitutes for rain protection.
Bottom line: Your Adventure Treks rain jacket should be a hard shell jacket.
DWR (durable water repellent): This is a treatment applied to a fabric to create a hydrophobic (“water-fearing”) surface. This is what causes water to “bead up” on the surface and roll off instead of soaking in. However, DWR does not mean it is waterproof!
Bottom line: DWR does not equal waterproof-breathable; make sure you purchase waterproof-breathable.
GoreTex: Similar to Kleenex or Velcro, GoreTex is a brand name commonly used as a “catch-all” for waterproof-breathable technology. GoreTex is widely considered to make the most effective waterproof-breathable membrane, and therefore can be commonly found on many different brand-name clothing. GoreTex is durable and reliable; if you plan to spend many hours being active outdoors, then it makes sense to spring for GoreTex.
Denier: This is a term that describes how thick a fabric is, and it often appears in a product description as a number followed by a “D” (e.g. 30D). The lower the number, the thinner and lighter the fabric. 10D is very light (think pantyhose); 300D is very thick (think heavy canvas). Most rain jackets are somewhere in the 30–50D range.
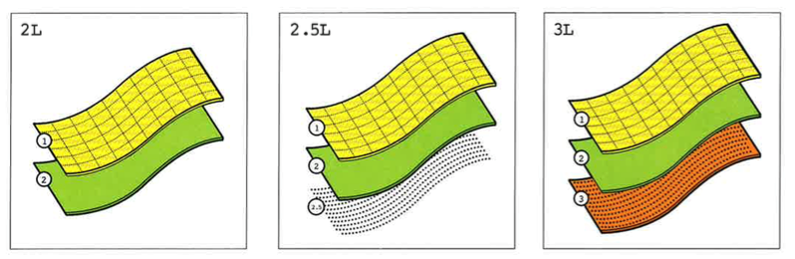
Rain gear styles
- 2-layer shell: This refers to rain gear that comprises the “face” (outer) fabric and the waterproof-breathable membrane on the inside. These two layers are laminated together or sprayed on as a coating.
- 2.5-layer shell: This is the similar to the 2-layer; these products are usually more affordable, but they are slightly less durable. Plus, people often report feeling a little clammy or moist on the inside.
- 3-layer shell: The same first two layers are laminated together (“face” fabric and inner waterproof-breathable membrane), but they have an additional durable layer laminated on the inside of the jacket. This “fabric-membrane-fabric” sandwich creates a highly durable, 3-layer shell that feels like a single piece of fabric. This is often the most expensive option because of the extra material and higher quality fabric; it also has a more advanced look and design.
Suggested rain jackets
- 2-layer hard shell: Marmot PreCip Jacket (men’s and women’s)
- 2.5-layer hard shell: Outdoor Research Apollo Jacket (men’s and women’s)
- 2-layer hard shell with GoreTex (my personal favorite and in my opinion the absolute best jacket for the money): Marmot Minimalist Jacket (men’s and women’s)
- 3-layer hard shell without GoreTex: Patagonia Torrentshell (men’s and women’s)
- Other recommended brands: REI Co-op, Columbia, Mountain Hardwear, The North Face
Our rain gear takeaways
So, we just threw a lot of technical terms out there. What does it all come down to? For an AT trip, pick a waterproof-breathable hard shell that keeps you warm and dry. Rain jackets must have a hood and should fit comfortably over fleece and baselayers. Just like the jacket, the rain pants need to be a waterproof-breathable shell that fit over your hiking, fleece, or baselayer bottoms. You might consider full side-zippers to get in and out of them more easily.